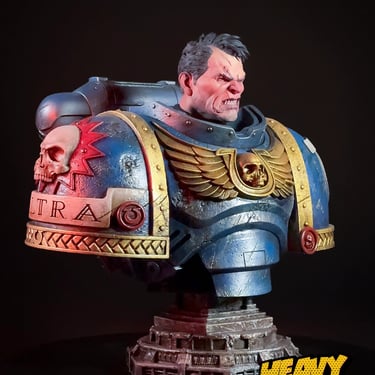
Painting Captain Titus
Heavy Handed
11/27/20253 min read
Space Marine II was my entry point into the world of Warhammer 40K. I fell in love with how ridiculously over-the-top the universe is, and how they lean into it with complete sincerity. It’s almost satire, but they never wink at the camera. They just commit. That energy spoke to me.
The game became something my son and I could explore together. We started collecting miniatures, playing the tabletop game, and I rediscovered how much I love painting. Coming from an illustration background, I already knew I enjoyed creating, but there’s something different about a physical piece you can hold and turn in your hands.
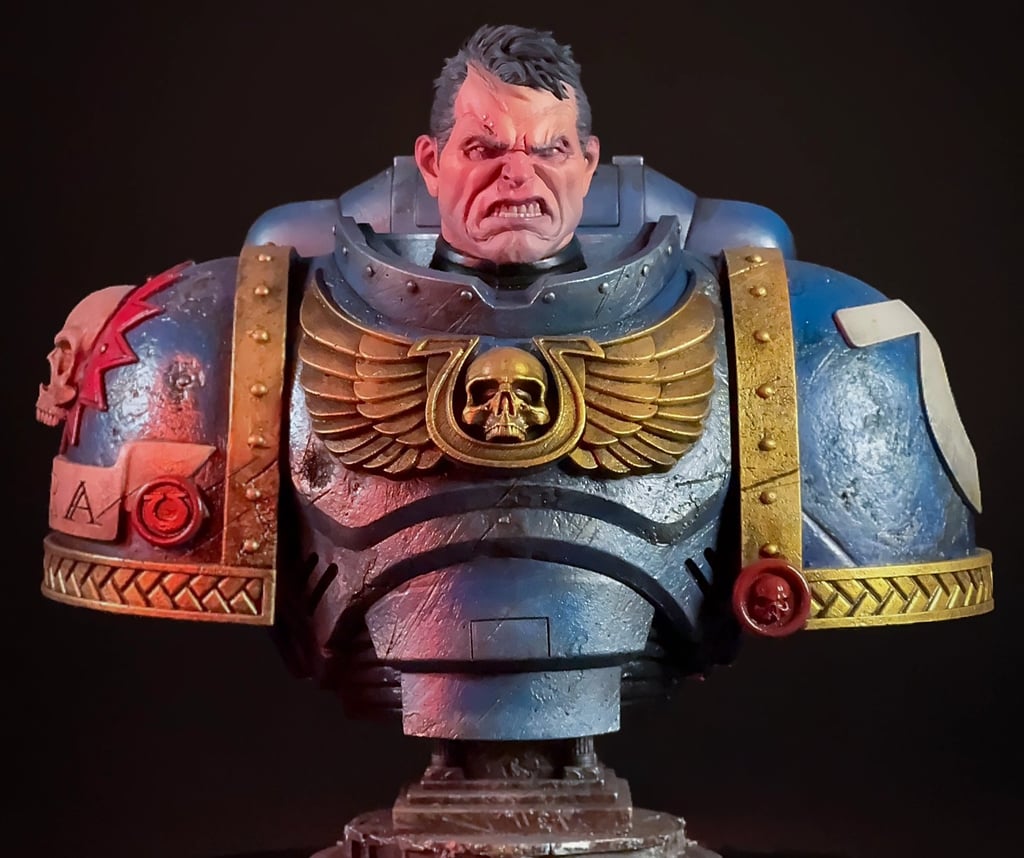
That spark led me to 3D printing. I wanted to go bigger. Miniatures are great, but I was drawn to larger scale pieces where you can really push the details. This Titus bust was my first major project in that direction, and I was determined to give it everything I had.
The Piece That Started It All
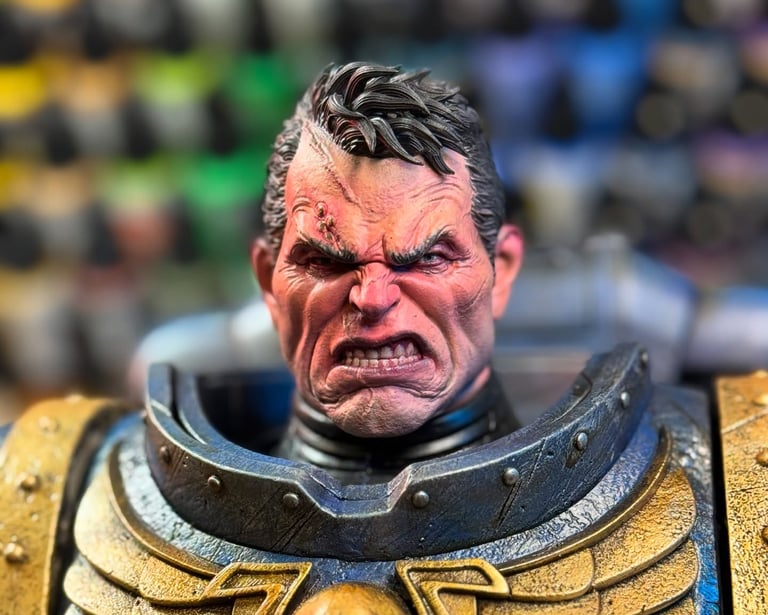
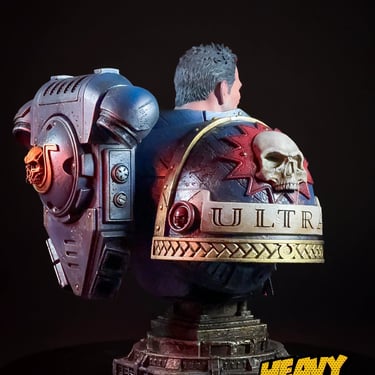
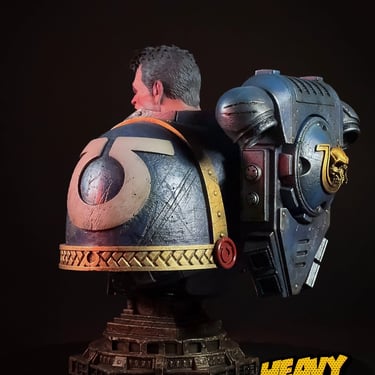
For the metallics, I used a technique I learned from @Groundeffected on YouTube. You lay down a chrome spray paint base, seal it with lacquer, let it fully cure, then come in with oil washes. The lacquer barrier lets you wipe the oil off the high points while it stays in the recesses. It’s a great way to build up that grimy, battle-worn look and sets you up with a solid undercoat for color.
Process
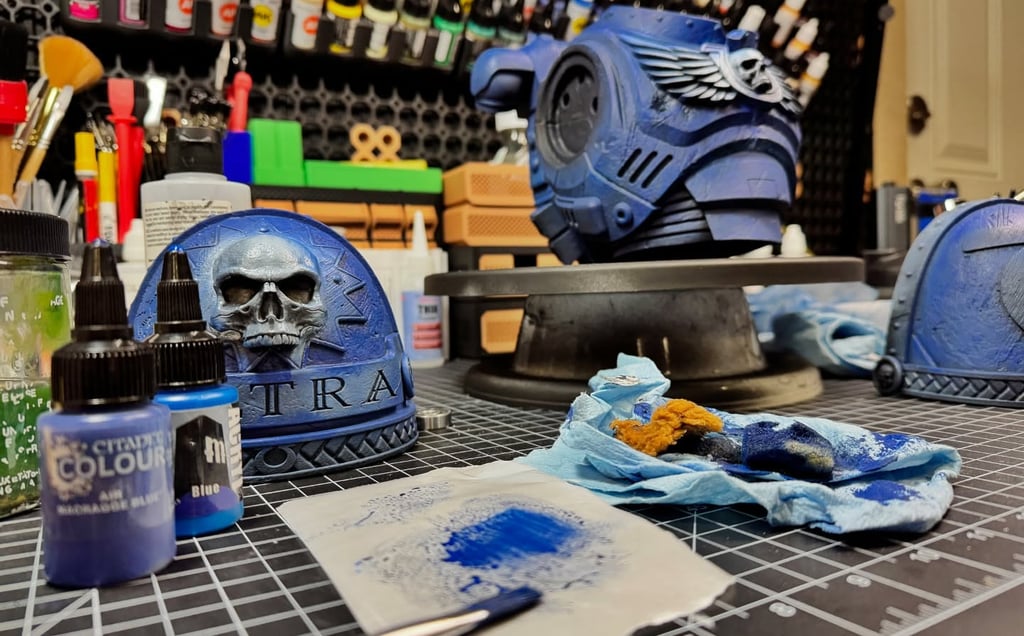
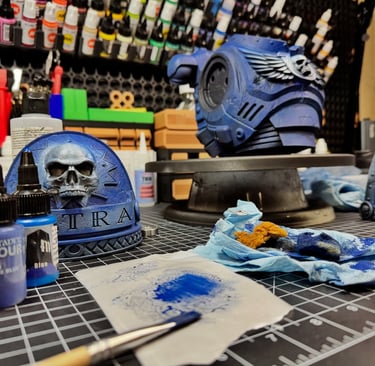
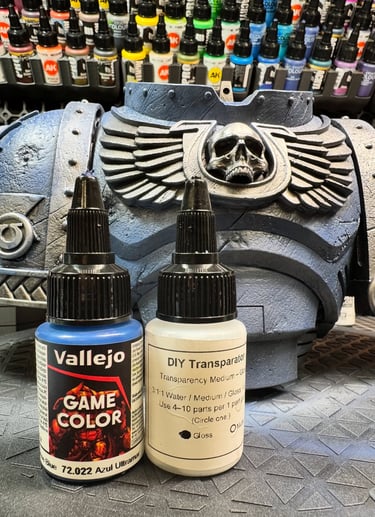
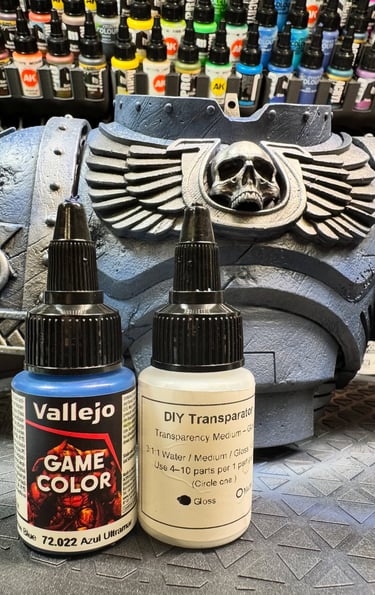
Paints were mostly Pro Acryl for the colors and Vallejo for the metallics. Coming from an illustration background, I like being able to mix what I need rather than hunting for the exact bottle. Pro Acryl feels high quality and you get a lot of it.
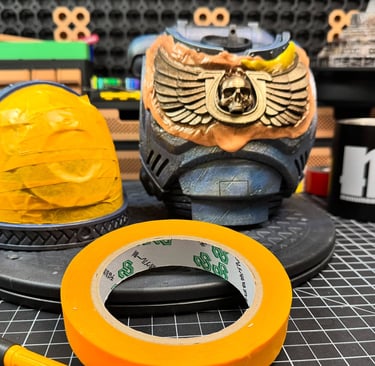
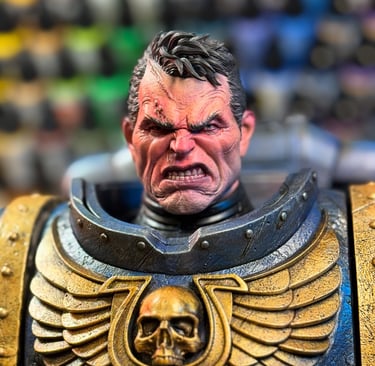
For masking off tricky areas like the gold Aquila on the chest, I used a combination of tape and silly putty. Silly putty is a lifesaver for irregular shapes where tape would be a nightmare. It conforms to the surface, peels off clean, and saves a ton of time.

Lessons
This piece taught me a lot about gap filling. When you’re printing large models in sections, protecting the keying of the parts matters. If edges get deformed, you end up with seams that don’t fit cleanly. This print wasn’t perfect, so I spent time filling gaps. It’s not flawless, but I got most of it sorted.
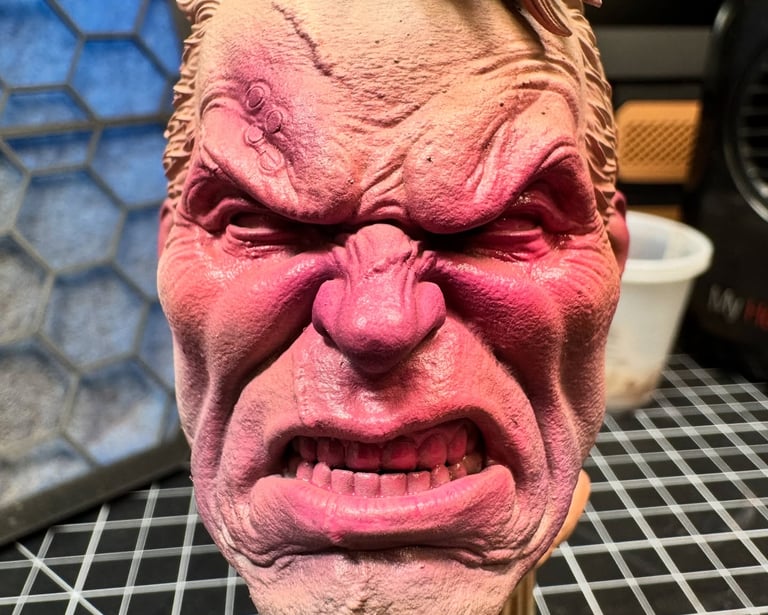
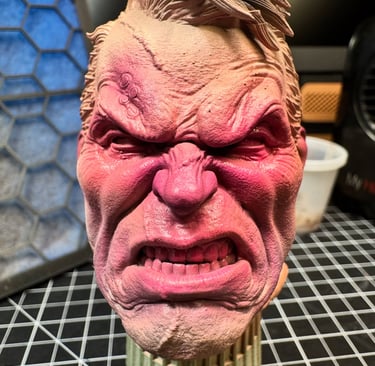
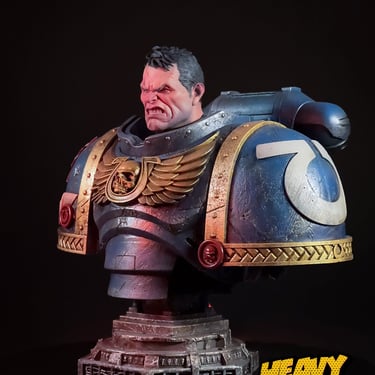
The bigger lesson was on Titus’s face. Early on, he looked like he’d been in a bar fight. All bruised and swollen. That’s what happens when you lean too hard into the reds and purples too quickly. The fix was touching in some complementary colors to neutralize things, but honestly it was mostly the flesh wash that saved it.
Never underestimate what a wash can do for you. When things start feeling chaotic, a wash might be exactly what you need to calm it down and make everything feel cohesive.
Details
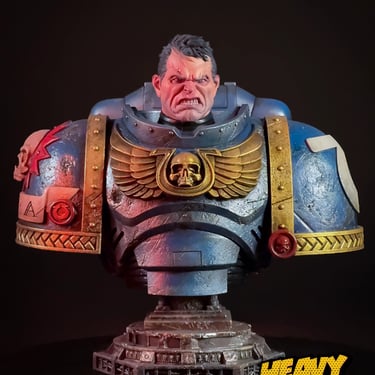
Scale: 1/4 scale portrait bust (~16″ tall)
Sculpted By: Wicked 3D
Paints: Pro Acryl, Vallejo Metallics, Citadel
Techniques: Chrome undercoat method, oil washes, silly putty masking
Shoutout: Metallic undercoat technique from @Groundeffected

Gallery
This one lives in my personal collection. If you're interested, reach out.